Is your PS4 HDMI port causing you trouble? If so, you’ve landed in the right place. In this comprehensive guide, we’ll walk you through the process of PS4 HDMI port repair, helping you get back to your gaming sessions without the need for professional assistance.
Understanding Your PS4 HDMI Port
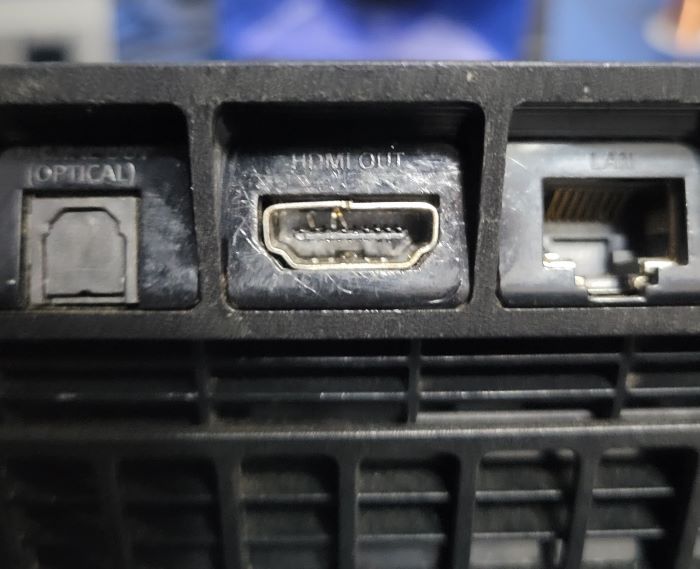
Your PlayStation 4 HDMI port is a crucial component that enables your console to connect with your television, monitor, or any other display device.
It’s a standard interface for transmitting uncompressed video data and compressed digital audio data. In simpler terms, it’s the bridge between your PS4 and your screen, enabling you to enjoy your games in high definition.
Common Symptoms of a Faulty HDMI Port
Before diving into the repair process, it’s essential to identify the signs of a faulty PS4 HDMI port. The most common symptoms include:
- No display or ‘No Signal’ message on your TV screen
- Distorted or flickering screen
- The console turning on but no display
- Physical damage to the HDMI port
Testing for the Problem
To confirm that the issue lies with the HDMI port, try testing your console with a different HDMI cable and display device. If the problems persist, it’s likely that the HDMI port is the culprit.
Is It Worth Fixing the HDMI Port Yourself?
The answer to this question depends on your comfort level with electronic repair. If you’re interested in learning about soldering or console repair, this can be a valuable DIY project.
However, if you just want a working HDMI port without any hassle, you might be better off taking your PS4 to a professional repair service.
Required Tools for PS4 HDMI Port Repair
Here’s a list of what you’ll need for a PS4 HDMI port repair:
- A new HDMI port
- A Phillips-head screwdriver
- A soldering iron
- Solder
- Desoldering braid (also known as solder wick)
- Flux
- Tweezers
Step-by-Step Guide to Repairing Your PS4 HDMI Port
Opening the Console
To start with, you’ll need to disassemble your PS4. Remember to unplug your console before starting the disassembly process.
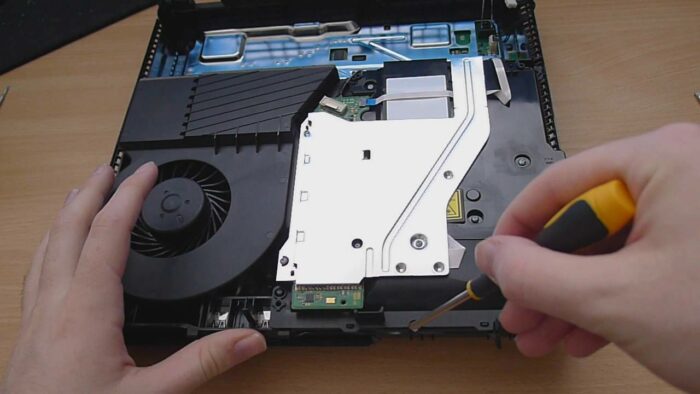
Removing the Motherboard
Once you’ve successfully opened your PS4, you’ll need to remove the motherboard. Be careful not to damage any components in the process.

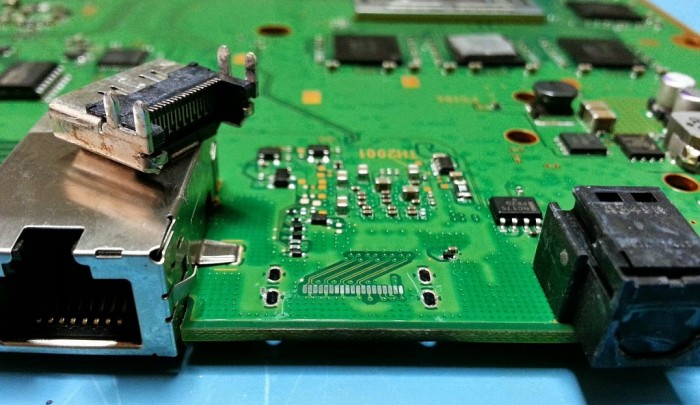
Desoldering the Damaged HDMI Port
After the motherboard is out, locate the HDMI port. To remove it, you’ll need to use the soldering iron and desoldering braid to remove the solder points holding the HDMI port in place.
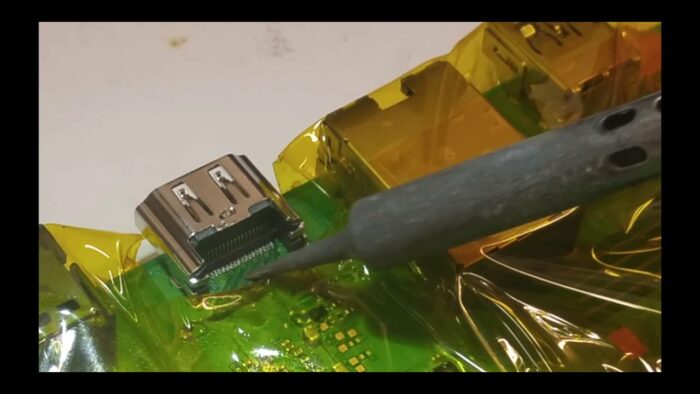
Installing the New HDMI Port
Once the old HDMI port is removed, clean up the area where the old port was attached using a small amount of flux and your soldering iron. Now, position the new HDMI port in the same location and solder it into place.
Reassembly
After successfully soldering the new HDMI port, you need to reassemble your PS4. Make sure to return every component to its original place carefully. If you face any confusion, refer to the disassembly images but in reverse order.
Testing the Repaired HDMI Port
Once your PS4 is back in one piece, it’s time to test the repaired HDMI port. Connect your console to the TV or any other display device using an HDMI cable. If everything was done correctly, your PS4 should now display correctly on your screen.
Final Thoughts and Precautions
While the PS4 HDMI port repair process can be a bit daunting for beginners, with patience and the right tools, it’s completely doable. Remember to take your time and refer back to this guide if you get stuck.
However, if you’re not comfortable with doing the repair yourself, it’s always best to take your console to a professional. Remember, it’s not worth risking further damage to your PS4 by attempting a repair you’re not comfortable with.
Always unplug your PS4 before attempting any repairs and handle all components with care to avoid causing any additional issues.
Frequently Asked Questions
How much does a professional PS4 HDMI port repair cost?
The cost of professional repair can vary widely depending on the severity of the damage and the service provider. However, you can typically expect it to range from $60 to $100.
What causes the PS4 HDMI port to break?
There can be several reasons behind a faulty HDMI port. It could be due to physical damage (like dropping your PS4), wear and tear from frequent plugging and unplugging of the HDMI cable, or even manufacturing defects.
Can the PS4 function without an HDMI port?
No, the HDMI port is the primary output for video and audio from your PS4 to your display device. Without it, you won’t be able to see or hear anything from your console on your TV or monitor.
How can I prevent my HDMI port from breaking or wearing out?
To avoid damaging your HDMI port, always handle your HDMI cable carefully. Avoid forceful insertion or removal and try not to move your PS4 around too much while the HDMI cable is connected.