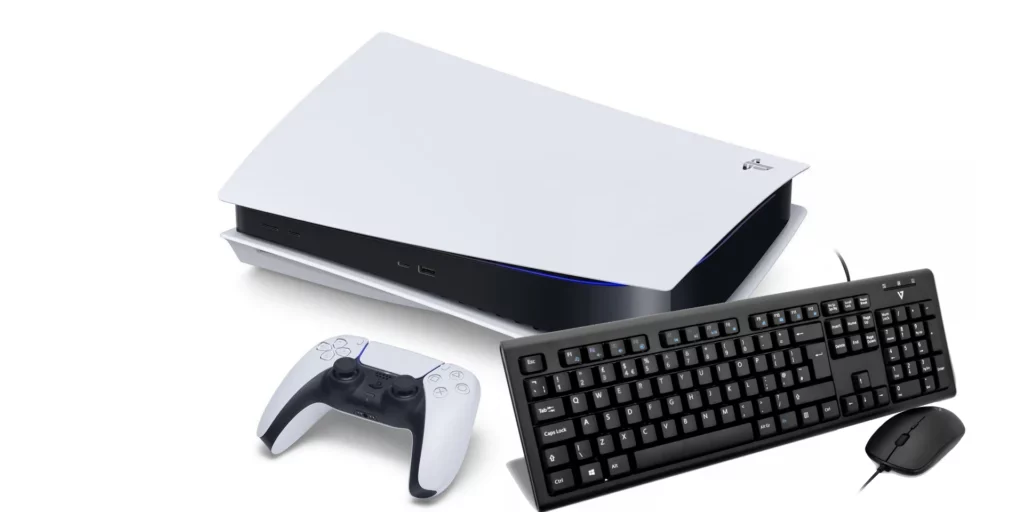
Optimizing your DNS settings on PS5 can significantly improve your gaming experience. This comprehensive guide is here to help even the most tech-challenged individuals effortlessly set up their DNS settings on PS5.
What is a DNS Server, and Why is it Important for PS5?
Domain Name System (DNS) is a vital component of the internet infrastructure, responsible for translating human-readable domain names into numerical IP addresses.
In simpler terms, DNS servers act as the internet’s phonebook, helping your devices connect to the correct servers.
For PS5 users, a fast and reliable DNS server can significantly improve online gaming experiences. It can lead to shorter loading times, reduced lag, and enhanced connectivity to gaming servers.
An optimized DNS server can unlock your PS5’s full potential and improve gaming sessions.
Benefits of Changing DNS Settings for PS5
Altering your PS5’s DNS settings can offer several benefits, including:
- Faster loading times for websites, games, and streaming services
- Reduced latency and lag while gaming
- Improved connectivity to gaming servers
- Enhanced security and privacy
- Bypassing regional restrictions or censorship
How to Change DNS Settings on PS5
Follow these simple steps to change the DNS settings on your PS5:
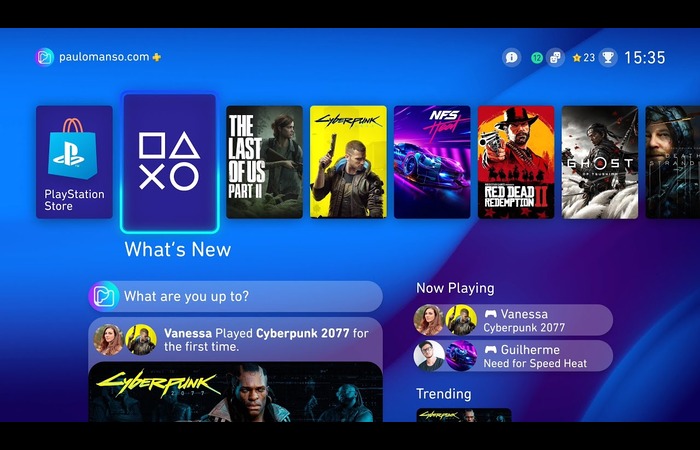
Step 2: Go to Settings
![]()
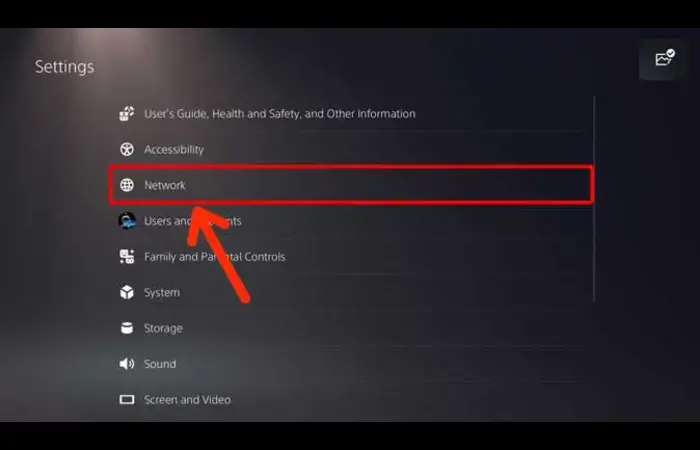
Step 3: Select Network
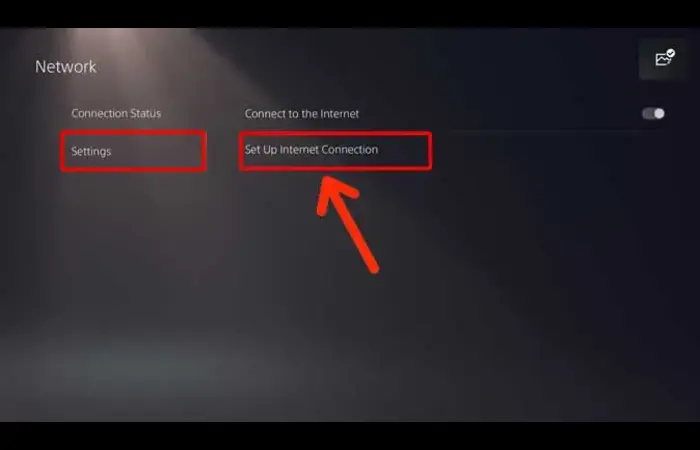
Step 4: Choose Settings, then select Set Up Internet Connection
Step 5: Pick your preferred internet connection type (Wi-Fi or LAN Cable)
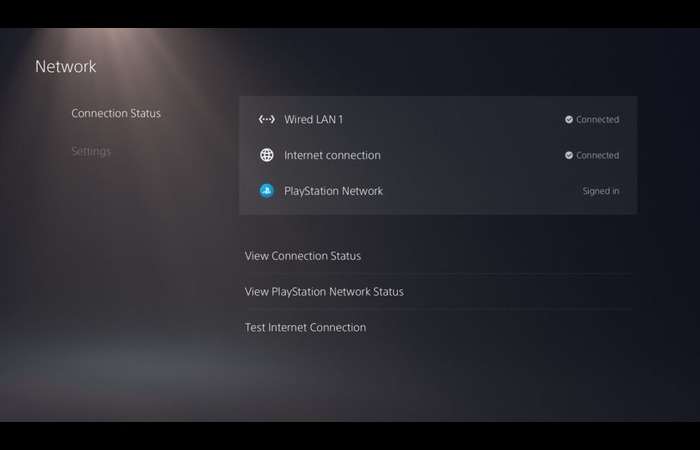
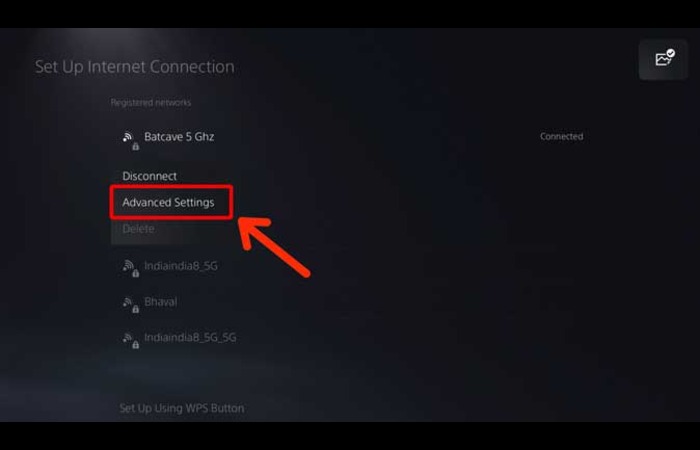
Step 6: Select Advanced Settings
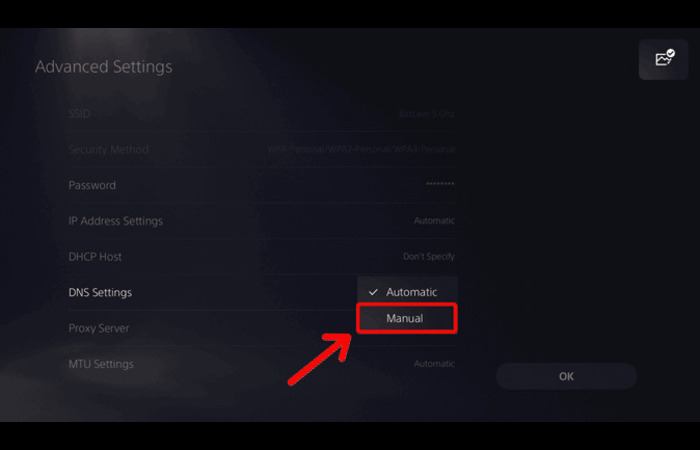
Step 7: Change DNS Settings to Manual
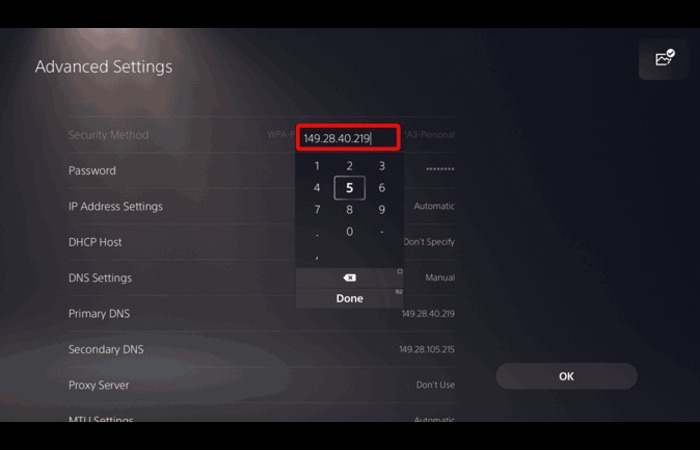
Step 8: Enter the Primary and Secondary DNS server addresses of your chosen DNS provider
Step 9: Save your settings and test your internet connection
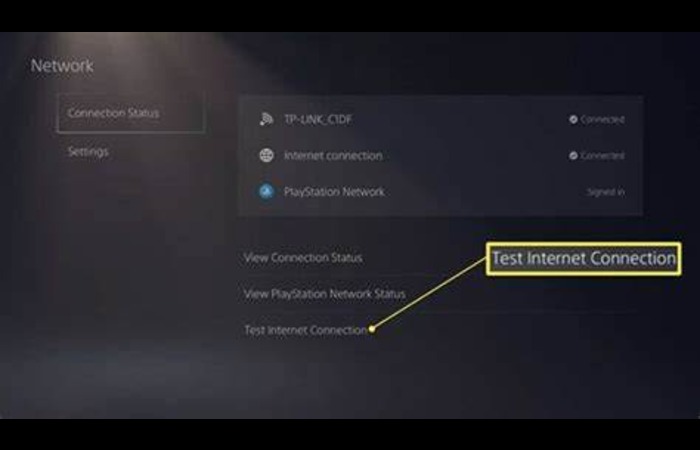
Remember to reboot your PS5 and network equipment (router/modem) after making these changes to ensure they take effect.
Top DNS Servers to Consider for Your PS5
Several DNS servers are suitable for PS5 users. Some of the most popular and reliable options include:
1. Google Public DNS:
- Primary – 8.8.8.8
- Secondary – 8.8.4.4
2. Cloudflare DNS:
- Primary – 1.1.1.1
- Secondary – 1.0.0.1
3. OpenDNS:
- Primary – 208.67.222.222
- Secondary – 208.67. 220.220
4. Quad9:
- Primary – 9.9.9.9
- Secondary – 149.112.112.112
5. Verisign DNS:
- Primary – 64.6.64.6
- Secondary – 64.6.65.6
6. Comodo Secure DNS:
- Primary – 8.26.56.26
- Secondary – 8.20.247.20
How to Find the Best DNS Servers for Your PS5
There are a few approaches to help you find the best DNS servers for your PS5:
- Approach 1: Choose from our list of public DNS servers mentioned above.
- Approach 2: Measure ping to find the DNS servers with the lowest latency. You can use online tools like PingPlotter or Command Prompt to test the response times of various DNS servers.
- Approach 3: Windows users can download and run the DNS Benchmark program to evaluate and compare the performance of different DNS servers.
Remember to test your internet connection on your PS5 after making any changes to your DNS settings.
FAQs
What are the benefits of changing DNS settings on PS5?
Changing DNS settings can improve loading times, reduce latency and lag, enhance connectivity to gaming servers, and provide better security and privacy.
How do I change the DNS settings on my PS5?
To change DNS settings on PS5, go to Settings > Network > Settings > Set Up Internet Connection > Advanced Settings > DNS Settings > Manual.
Then, enter the Primary and Secondary DNS server addresses of your chosen DNS provider.
Is it safe to change DNS settings on PS5?
Yes, it is safe to change DNS settings on PS5. However, use reputable DNS providers to avoid potential security risks or connectivity issues.
What is the best DNS server for PS5?
The best DNS server for your PS5 depends on your location, internet service provider, and personal preferences. Some popular options include Google Public DNS, Cloudflare DNS, and OpenDNS.
Why should I consider using custom DNS servers for my PS5?
Custom DNS servers can lead to faster loading times, improved gaming experiences, and enhanced security and privacy.

