Understanding IP Addresses and DNS
An IP address (Internet Protocol address) is a unique numerical identifier assigned to devices connected to a network, enabling them to communicate with each other. DNS (Domain Name System) is a system that translates human-friendly domain names into IP addresses that computers can understand.
In PS4 gaming, choosing the best IP address and DNS server can improve the online gaming experience, faster downloads, and better connections to game servers.
Why Change Your DNS Server?
The default DNS server provided by your Internet Service Provider (ISP) may not always be the fastest or most reliable. Changing to a different DNS server can provide you with several benefits:
- Faster response times
- Improved gaming performance
- Better security
- Enhanced privacy
How to Find Your PS4 IP Address
To find your PS4 IP address, follow these steps:
-
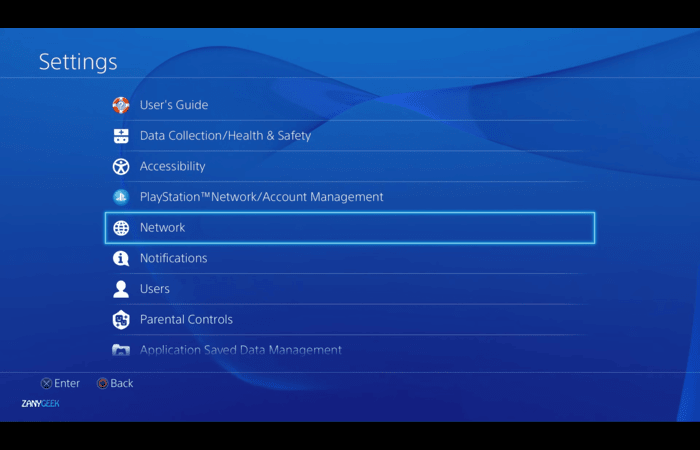
- Go to the PS4 main menu and select “Settings.”
-
- Scroll down and select “Network.”
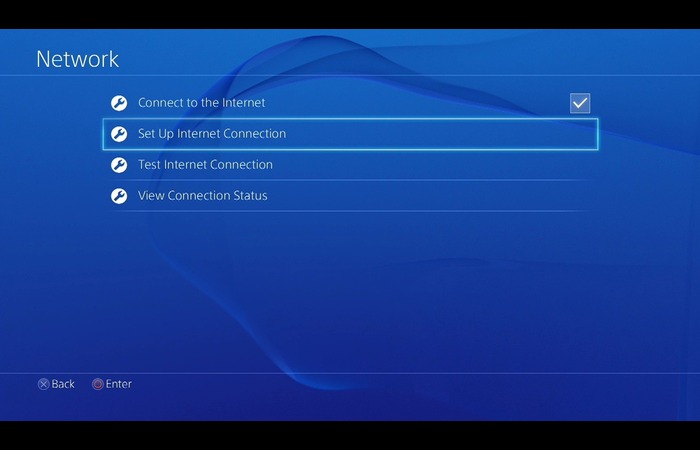
- Choose “View Connection Status.”
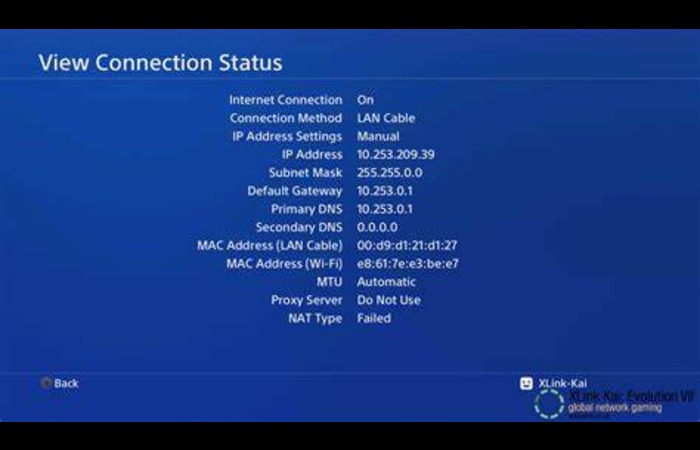
- Your PS4 IP address will be displayed under “IP Address.”
How to Configure DNS for PS4
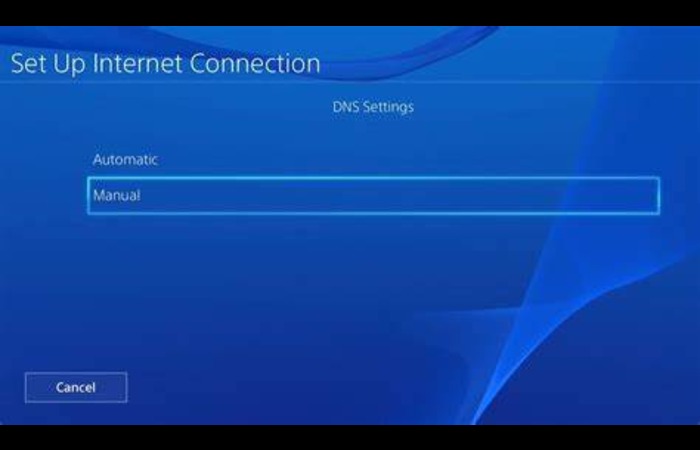
Here’s how you can configure your PS4 to use a different DNS server:
- Go to the PS4 main menu and select “Settings.”
- Scroll down and select “Network.”
- Choose “Set Up Internet Connection.”
- Select “Use Wi-Fi” or “Use a LAN Cable,” depending on your connection type.
- Choose “Custom.”
- Select “Automatic” for IP Address Settings.
- Set “DHCP Host Name” to “Do Not Specify.”
- Select “Manual” for DNS Settings.
- Enter the Primary and Secondary DNS server addresses.
- Select “Automatic” for MTU Settings and “Do Not Use” for Proxy Server.
- Test your internet connection to make sure it is working correctly.
Top DNS Servers for PS4 Gaming
The following DNS servers are known for their speed, reliability, and security, making them excellent choices for PS4 gaming:
- Google Public DNS:
Primary: 8.8.8.8
Secondary: 8.8.4.4
- OpenDNS (Cisco):
Primary: 208.67.222.222
Secondary: 208.67.220.220
- Cloudflare:
Primary: 1.1.1.1
Secondary: 1.0.0.1
- Quad9:
Primary: Primary: 9.9.9.9
Secondary: 149.112.112.112
- Comodo Secure DNS:
Primary: 8.26.56.26
Secondary: 8.20.247.20
- Verisign Public DNS:
Primary: 64.6.64.6
Secondary: 64.6.65.6
- Alternate DNS:
Primary: 198.101.242.72
Secondary: 23.253.163.53
- Oracle Dyn (Dynamic DNS):
Primary: 216.146.35.35
Secondary: 216.146.36.36
Setting a Static IP Address for Gaming
A static IP address ensures that your PS4 always has the same IP address, making it easier to manage port forwarding and other network configurations. There are two methods to set up a static IP address for your PS4:
Method 1: Set up your router to assign the same IP address to your PS4
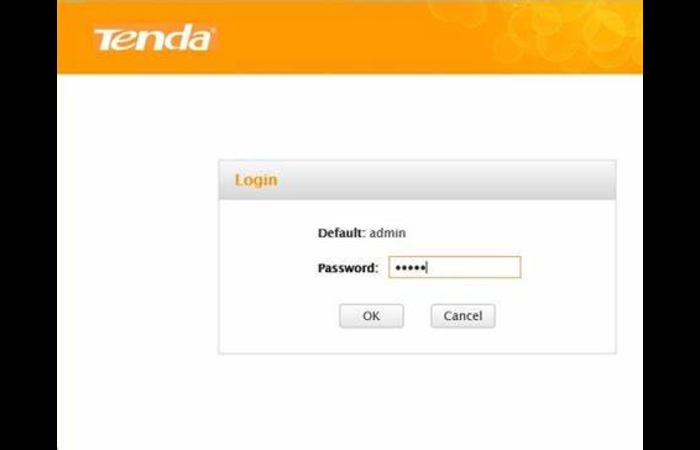
1. Log in to your router’s web interface. The exact steps to do this vary depending on your router’s model.
Find the DHCP settings and locate the option to reserve an IP address for your PS4. This may be called an “Address Reservation” or “Static Lease.”
Enter your PS4’s MAC address and the desired IP address.
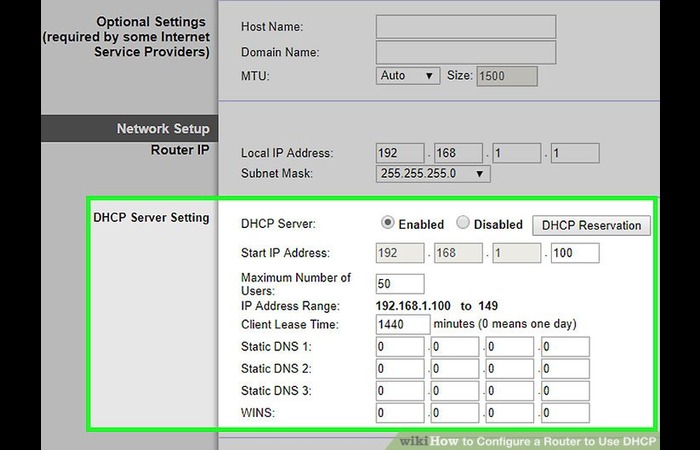
Save the settings and restart your router if necessary.
Method 2: Set up your PS4 to use a static IP address
1. Find an available IP address within your router’s DHCP range. This information can usually be found in your router’s web interface.
Follow steps 1-6 from the “How to Configure DNS for PS4” section.
Select “Manual” for IP Address Settings.
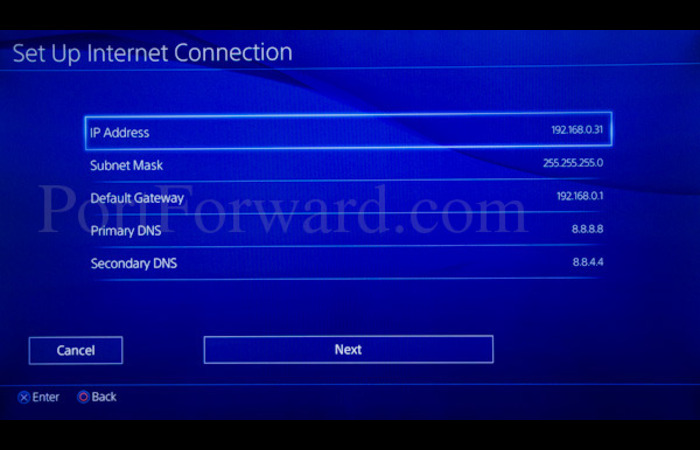
Enter the IP address, Subnet Mask, Default Gateway, Primary DNS, and Secondary DNS.
Complete the setup and test your internet connection.
Testing DNS Performance on Your Computer
You can test the performance of different DNS servers on your computer using the following methods:
Approach 1: Ping Test
1. Open Command Prompt (Windows) or Terminal (macOS).
2. Enter “ping [DNS server IP address]” and press Enter.
3. Note the time it takes for the ping to complete (measured in milliseconds).
Perform this test for multiple DNS servers and compare the results to determine which service provides the lowest ping time.
Approach 2: DNS Benchmark Tool
Use a DNS benchmark tool, such as Namebench (Windows, macOS) or DNS Benchmark (Windows), to test and compare the performance of different DNS servers automatically.
- Download and install the benchmark tool.
- Run the tool and follow the on-screen instructions.
- Compare the results to find the best-performing DNS server for your location.
Conclusion
Finding the best IP address and DNS server for your PS4 can significantly improve your gaming experience by providing faster response times and more stable connections.
Following the steps outlined in this article, you can configure your PS4 to use the best DNS servers, set up a static IP address, and test the performance of different DNS servers to ensure you have the best possible gaming experience.
Remember, the ideal DNS server may vary depending on your location, so it’s essential to test multiple servers to find the best one for your needs. Keep experimenting, and enjoy your optimized PS4 gaming experience.
FAQs
Is it safe to change DNS on PS4?
Yes, changing DNS on your PS4 is safe and can even improve your online gaming experience.
What does a static IP address mean?
A static IP address is a fixed IP address that doesn’t change, making it easier to manage network configurations and port forwarding.
Do I need a static IP address for gaming?
While not necessary, a static IP address can make it easier to manage your network settings for a better gaming experience.
How can I find my PS4’s IP address?
You can find your PS4’s IP address by following these steps:
- Go to “Settings” on your PS4 home screen.
- Select “Network.”
- Select “View Connection Status.”
- Your PS4’s IP address will be displayed.
Can a PS4 be used to find someone’s IP address?
No, a PS4 cannot be used to find someone’s IP address. However, other methods exist to find someone’s IP address, such as using IP tracking tools or analyzing network traffic logs.
Where can I change my DNS server settings?
You can change your DNS server settings on your PS4 by following the steps outlined in the “How to Configure DNS for PS4” section of this article.
How do I check my current DNS server?
You can check your current DNS server on your PS4 by following these steps:
- Go to “Settings” on your PS4 home screen.
- Select “Network.”
- Select “Set Up Internet Connection.”
- Choose “Wi-Fi” or “LAN Cable,” depending on your connection type.
- Select “Custom.”
- The “DNS Settings” section will display your current DNS settings.
